3.25.2008
The Staber Washer
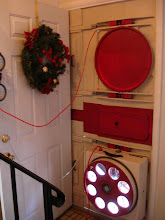
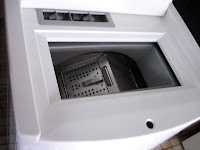
A year ago, after much research, we ordered a Staber washer, made in Ohio and built to last 25 years. It's a top-loader that runs like a front-loader. After you close the top of the basket with your laundry in it, it rotates on a horizontal axis. Though this type of machine is popular in Europe, the Staber is the only one made in the U.S.
It's on the Energy Star list of efficient washers. It's not in the very highest efficiency Energy Star tier because Energy Star doesn't subtract the agitator to judge volume (an ordinary top-loader with this drum size could not hold a full load). Yet it holds a full load (approx. 18 pounds), because we can fill it completely full since there is no agitator and no front-door gasket to avoid (front-loaders often leak when clothes get caught in the door gasket). So it uses less energy, less water and much less normal detergent than most washers, and it does a load in about the same amount of time as our old top-loader. See http://www.staber.com and be sure to watch the video.
The Staber sounded superior to any other washers sold in the U.S. from the specs and the testimonials and forums I read, including Consumer Reports forums (it wasn't included in their tests). It also has the critical advantage of fitting in our small laundry room. Our distant second choice was the Fisher & Paykel Intuitive Eco top loader with flex agitator, but the brand seems to require frequent repairs. Third choice was the Whirlpool LHW0050 front-loader, but while the measurements seemed about right, I wasn't sure that our laundry room doors would have given the front door enough clearance, and front-loader door gaskets seem to require frequent cleaning with bleach to prevent mold.
We wash the laundry only in cold water, and the Staber does a better job in cold water than our old top-loading washers. It is gentler on the clothes too, since there is no agitator to stretch or pull them. It gets more soap out of the clothes, which pleases my sensitive skin. After using it for a year, we are both still very pleased with it.
After washing a load in the Staber, it's already much dryer from the spin cycle than any washer I've used. With that and the dryer duct replacement and vent cleaning, the laundry dries much sooner. We switched to using the dryer's dryness sensor instead of its timed drying cycle, which makes so much sense I keep having "I could have had a V-8" moments for not switching sooner. Since the clothes are not being overheated, they are not shrinking as much and they are softer.
3.11.2008
A Metal Dryer Duct & A Clean Vent
With the washer out of position after the overflow, I noticed we had rare access to the dryer vent. I'd read that homeowners should have the dryer vent cleaned every few years to prevent a fire hazard, so I looked online for how to get that done.
I learned that the vinyl/plastic and aluminum foil dryer vents ARE fire hazards. The rigid metal and semi-rigid metal ducts are both much safer. The rigid metal duct is the best choice if your path from the dryer to the opening in the wall or floor is pretty straight, since the escaping air, moisture, and lint encounters the least friction on the way out, drying the clothes that much more efficiently. Our path is like a question mark, so when I called the Dryer Vent Wizard to arrange a cleaning, I asked if he could also replace the old foil vent with a semi-rigid metal dryer vent.
Bill from Dryer Vent Wizard came and put in a semi-rigid duct with lots of metal tape to make sure the connection was secure. He cleaned from the dryer all the way to the outside outlet, sending vast plumes of lint into the air. Cough, cough. I came inside. The speed of the air coming out went from 8.2 mph to 15 mph. He said he usually sees a big improvement, but he was impressed. He even raked the leaves on the patio to clean up the lint.
He also told me that if we used dryer sheets, they leave a residue that blocks the lint screen. He said I should take an old toothbrush & soap and clean the lint screen every now and then. He said you can tell if it needs it by just holding it under running water, which would pool instead of just going through. I tried it. He was totally right. The lint screen might as well have had clear plastic over it. Then I cleaned it for a few minutes and the water ran straight through it.
We looked forward to the clothes drying faster, once we had a working washer.
3.10.2008
Stopping a Washer Flood
Our second Spring in the house, in 2007, our washer overflowed. We did the towels and buckets routine. We moved the washer out of its spot. I called a carpet company and they brought ozone generators to quickly finish drying the floor, walls and nearby carpet to prevent mold. I didn't want to worry about water damage from that source again. I didn't want to breathe that amount of concentrated ozone in my home again either.
I discovered the Samurai Appliance Repair Man's suggestions for preventing a washer flood in the future at http://fixitnow.com/2005/03/three-easy-steps-to-total-washing.htm. Confirmed by my research at other sites, the three steps seemed like very good ideas. So I ordered the FloodStop, a smart system that shuts off the faucets if it detects water on the floor. We already had the steel-braided fill hoses, and they had not leaked. I also ordered the leak catcher, which is a plastic "dish" like the one under the dish drainer on the kitchen counter but big enough to sit under the washer.
After the FloodStop arrived, we installed its shut-off valves on both the hot and cold water faucets. We plugged the valves into the control unit. We plugged the moisture sensor into the control unit. We plugged the control unit into the power outlet. We rested the moisture sensor on the floor.
Since we'd unplugged the fill hoses from the old washer before moving it out, it was easy to test the FloodStop. We turned on a faucet and splashed a little water onto the sensor. The water immediately stopped. We dried the sensor with a towel and then waited for it to dry completely to test the other faucet. Its shut-off valve worked like a charm, too.
Even for the people (not us) who shut off both faucets after every washer use, this is a good idea. Our washer overflowed while we were using it, but we were watching movies with a guest and we didn't notice until the water had covered a surprising distance. I think the water level sensor of the old washer failed. I didn't confirm this because I wasn't willing to give it another chance, and it was a good time for us to switch to an energy-efficient washer. Bottomline: The FloodStop is a clever device that should save a lot of people from a lot of hassle, expense and anxiety.
I discovered the Samurai Appliance Repair Man's suggestions for preventing a washer flood in the future at http://fixitnow.com/2005/03/three-easy-steps-to-total-washing.htm. Confirmed by my research at other sites, the three steps seemed like very good ideas. So I ordered the FloodStop, a smart system that shuts off the faucets if it detects water on the floor. We already had the steel-braided fill hoses, and they had not leaked. I also ordered the leak catcher, which is a plastic "dish" like the one under the dish drainer on the kitchen counter but big enough to sit under the washer.
After the FloodStop arrived, we installed its shut-off valves on both the hot and cold water faucets. We plugged the valves into the control unit. We plugged the moisture sensor into the control unit. We plugged the control unit into the power outlet. We rested the moisture sensor on the floor.
Since we'd unplugged the fill hoses from the old washer before moving it out, it was easy to test the FloodStop. We turned on a faucet and splashed a little water onto the sensor. The water immediately stopped. We dried the sensor with a towel and then waited for it to dry completely to test the other faucet. Its shut-off valve worked like a charm, too.
Even for the people (not us) who shut off both faucets after every washer use, this is a good idea. Our washer overflowed while we were using it, but we were watching movies with a guest and we didn't notice until the water had covered a surprising distance. I think the water level sensor of the old washer failed. I didn't confirm this because I wasn't willing to give it another chance, and it was a good time for us to switch to an energy-efficient washer. Bottomline: The FloodStop is a clever device that should save a lot of people from a lot of hassle, expense and anxiety.
3.04.2008
23 Lightbulbs & A Carbon Fast
Not long after we moved in, we noticed we were replacing the front porch lightbulbs surprisingly often. We even wondered if the sockets were bad. I was pleased to find compact fluorescent lightbulbs (CFLs) that were shaped like regular incandescent bulbs and we replaced the porch bulbs to save electricity. Happily, they are lasting a very long time. We've only taken them out to put in yellow bug CFLs for warm weather and then replaced them again with the white ones.
Later, we replaced the patio bulb with a CFL too. Later still, we replaced 14 lightbulbs in a fairly short time: ten of them were bathroom vanity lights! One site claimed that if you didn't leave the lights on for hours, it wasn't efficient to switch to CFLs. I think we're vain enough to get our money's worth ;-)
Weeks later, we replaced four more lightbulbs. And then a couple more. It's been 23 so far and we still have more to go! It's been tough trying to replace the chandelier bulbs that are on a dimmer, but hopefully soon the CFLs that claim to work on a dimmer will do so very well. For the ones we've been using, reducing the energy used while still enjoying nice lighting is a kick.
I bought some small spiral CFLs at Costco in bulk to put in the lamps where you don't see the bulb and more conventionally-shaped ones at Home Depot. Here are sites to help with choosing a low-energy lightbulb:
http://www.energystar.gov/index.cfm?c=cfls.pr_cfls
http://www.edf.org/page.cfm?tagID=632&campaign=mts
We are also becoming more conscious about turning out lights when we leave their area. To become more conscious of green opportunities like that, here is a Carbon Fast to do for 40 days (The Rt. Rev. James Jones, Bishop of Liverpool, created it for Lent, but any 40 day period will do): http://www.tearfund.org/webdocs/Website/Churches/Carbon%20Fast.pdf You can sign up for 40 days of emails to help you stick with the Carbon Fast.
Subscribe to:
Posts (Atom)