On January 4th, Thom of
Energy Services Group came to do an energy audit of our house. He asked for our primary reason for doing the audit. I told him that we wanted to save money on energy, have healthier indoor air and reduce our carbon footprint, but our primary reason was to have more comfortable indoor temperatures. The upstairs was around five to seven degrees warmer than the downstairs year-round and being warm enough downstairs meant turning up the heat a lot.
The difference between our upstairs office at the Western corner of the house and our living room underneath it could be even more. Thom said that replacing our Venetian blinds in both rooms with solid shades would create an air cushion that would help, drapes even more. Low-E glass would help in the office, but I like the warmth of the sun through the glass and I work there all day. (Since my husband likes it cold, a compromise may be that after enjoying warmth and sunshine in the morning, I close shades and drapes midday to prevent the room from being too warm in the evening when he gets home and gets on his computer.)
Thom said he was pleased to be able to audit a house with a
damper pillow in the fireplace. He had recommended them as a low-cost way ($50) to seal the fireplace when not in use, but he had not had the opportunity to test one.
He used the infrared scanner and showed me on the scanner where the cold air was coming in. As expected, it was coming in through the windows, the fireplace, where ceilings meet walls, through the sliding glass door. Less expected was that cold air was coming in where the shed meets our kitchen wall and well into the room along the top of that wall. As expected, cold air was coming in around the attic door. He said it's difficult to address the attic door and I told him that the damper pillow company makes a product to seal attic doors too and we agreed it's cheap enough at around $60 to try. Surprisingly, cold air was visible through the wall just above the furnace.

Then he put the blower door in our front door and used the scanner again all around. This time we found where cold air was coming in by feeling the blasts of air with our hands. The damper pillow wasn't sealing, so I blew more air into it and it did better but still not complete --I'll try to position it better later, and check on it regularly to see if it needs more air. There was a lot of cold air coming up through the masonry that needs "pointing" --some of the bricks are missing cement between them-- in the firebox floor. There was also cold air coming in the register that's low on the outside wall in the kitchen. He said it may be worthwhile, if we replace our furnace at some point with a high efficiency one or a heat pump, to cap that register and put a new register --angled to send air in two directions-- on the kitchen ceiling. That placement would avoid two bends in the duct for greater efficiency.
Cold air came in most dramatically right above the furnace. He said we'd see where that was coming from in the attic. Cold air also came in the upstairs bathroom fan openings. He said that eventually we should get better bathroom fans for about $150 each that have a damper that closes completely when they are off. He said making the house tighter would necessitate bringing more fresh air inside and efficient bathroom fans could do that on a low setting. He also said that a new furnace or heat pump would have a fan that would cost one-fifth of ours to run. Since we run it all the time when it's warm, that would be substantial savings.
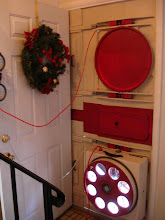
Then he turned off the blower and we went into the attic. Thom recognized my
BoGo solar task light since he gives them to clients! He borrowed it, because it was brighter than his flashlight. Looking under our loose fiberglass insulation, he was surprised to find a vapor barrier but said it isn't that helpful. He said our attic had better ventilation than most, which is good, and our home inspector had told us that, too. Thom found gaps in the loose insulation, some probably caused by our custom cable installer sliding through it. Thom showed me how the furnace chimney needs to be sealed where it meets the attic floor. He said if we replace the furnace with a high efficiency unit, we should cap the old vent where it meets the attic floor or remove it and seal the roof.
Looking for dirty insulation as a good indicator, he found other gaps. The biggest gap was an inch or two wide and several feet long, along the edge of the house above the master bath. He said even today's builders often use this type of plumbing cavity and then never seal the top of it. That's the source of the major draft we felt right above the furnace. The air travels down that shaft along the outside wall and then along a duct into the furnace room. He said, "We'll seal that." Thom has an air sealing company, so he spoke as if he would do the work, although he offered to give me a list of other approved contractors if I wished. He said 80% of houses lose most of their heat through unsealed gaps and poor insulation in the attic. He also said that sealing or replacing windows rarely has a big impact.
We looked in the utility shed. He said he would cut open the drywall of the shed attic, to see why so much cold air is going into the house where they meet. I suggested it might be the central vacuum system ductwork: the unit is no longer hooked up to it, so the duct is open in the shed. He looked at the air conditioning unit nearby to check its capacity.
I asked him if we should wait to do any of the steps we talked about. He said he would send and email his report, which would include the recommended order. He said that basically it's attic, then shed, then anything else we're going to do, then replace the heater last, so we really test the final tightness of the house to determine the size/capacity of the heater we need. He said that we could wait on the heater until we're ready or it quits, since it may be the original unit from 1971. He said the new furnace would be around $6,000 for our house size. He is encouraging the state to do a low-cost loan program for high-efficiency heaters. That's the same price we were quoted by another company for replacement windows, by the way.
To Do List:
- Have the air sealing and insulation done to the attic and shed attic.
- Get an attic door cover, shades & drapes.
- Look into an electric fireplace insert.
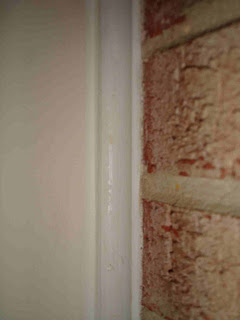
- Put clear caulk around the fireplace at the sides and ceiling, either by the trim with painter's tape or remove the trim and do it and then put the trim back. Use clear caulk to seal the frame around the sliding glass door.
- Save up for an energy-efficient sealed gas furnace or heat pump.
Thom teaches air sealing and learned about energy efficiency from the Princeton researcher who started the company 27 years ago. He said that some of the $450 audit fee I paid would apply toward the air sealing work, because he wouldn't need to do the inspection again, so I chose his company to do the work. They will re-do the energy audit afterward to be sure the changes have been effective.


 After the FloodStop arrived, we installed its shut-off valves on both the hot and cold water faucets. We plugged the valves into the control unit. We plugged the moisture sensor into the control unit. We plugged the control unit into the power outlet. We rested the moisture sensor on the floor.

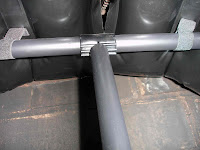
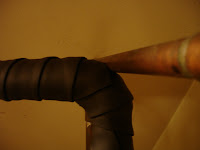
 I barely managed to get both layers between the two pipes.